
Hi there: Here is the link for my YouTube Channel – Stampin\’ Up! with Nadine V
RIBBON BOX – STORAGE and ORGANIZE
Material needed – Found in the Stampin\’ Up! Annual Catalogue 2020/22
- Card stock – pages 142 – 143 in the Stampin\’Up! Annual Catalogue 2020/22
- Designer Series Paper – Pages 148 – 150 Stampin\’ Up! Annual Catalogue 2020/22
- Detailed Trio Punch – #146320 pg. 165
- Tear and Tape Adhesive – #138995 pg. # 162
- Spool of Ribbon (various sizes) page #160 – #161
- Paper Trimmer – #152392 pg. # 151
- Stampin\’ Seal adhesive – #152813 pg. #162
- Take a Pick Tool # 150006 pg. # 159
- Paper Snips # 103579 pg. # 159
- Bone Folder # 102300 pg. # 159
Measurements –
For a 3 ¼” inch x ½” inch, Ribbon Spool
· Using your Paper Trimmer Cut a piece of card stock at 8” inch x 3 ¾” inch
· Using your Paper Trimmer Cut a piece of DSP (designer Series paper) 3” inch x 3” inch (Optional)
Instructions –
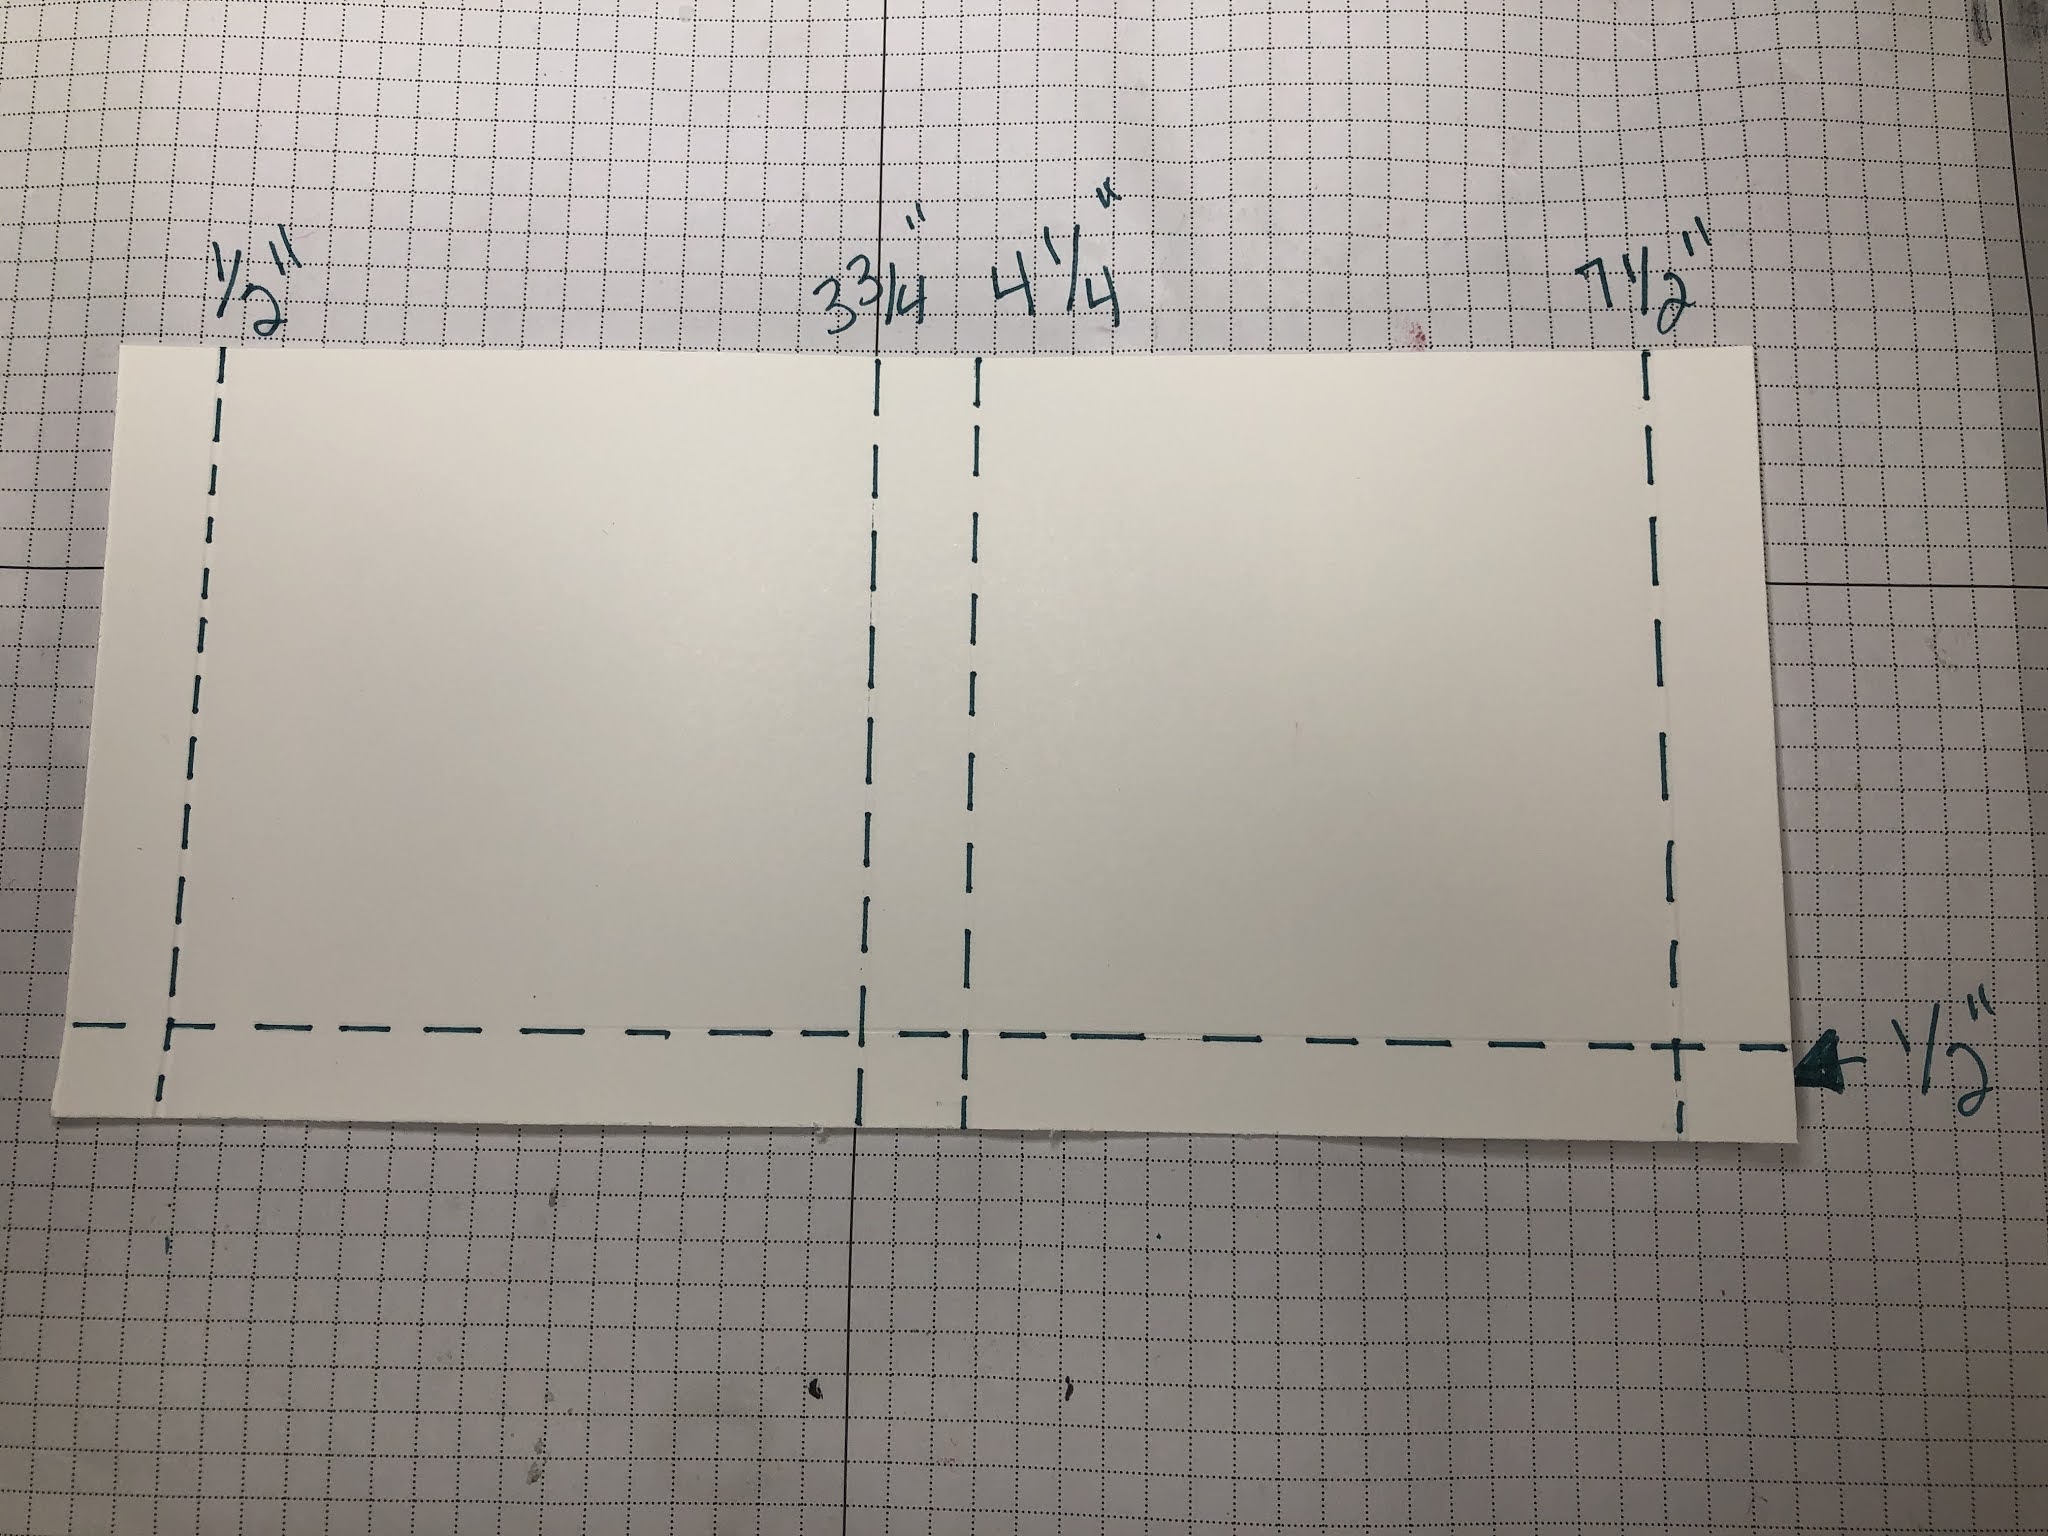
Place the card stock along the top edge of your trimmer with the long 8” side card stock
Score at ½”, 3 ¾”, 4 ¼” 7 ½”
Place the card stock along the top edge of your trimmer with the short 3 ¾” side along
Score at ½”
Use the Detailed Trio Punch – punch a hole in the centre of the second ½ section of your card piece. Please note – the ideal placement of the hole should be opposite to the bottom of the paper where the ½” score line is.
Place a strip of Tear and Tape adhesive on the outside ½” tab and another strip of tape on the adjacent ½” tab on the bottom.
(Optional) At this point- Before you assemble the box, on the other side of card stock place the DSP in one of the 3 ¼” x 3 ¼’ squares with Stampin’ Seal
Remove the protective film on the 2 pieces of Tear and Tape and start assembling.
Place your ribbon spool in the box and feed the ribbon through the punched hole
WAA LAA!
YOU DID IT!
EASY PEAZY LEMON SQUEEZIE


Follow me on YouTube for more instructional videos. \”Stampin\’ Up! with Nadine V\”
STAY TUNED ![]()
From my Stampin’ Studio, Nadine V
Box Size for Ribbon Spool
For a 3 ¼” inch x 7/8” inch, Ribbon Spool
· Using your Paper Trimmer Cut a piece of card stock at 9” 1/8 inch x 4 1/8” inch
· Using your Paper Trimmer Cut a piece of DSP (designer Series paper) 3” inch x 3” inch (Optional)
Instructions –
Place the card stock along the top edge of your trimmer with the long 8” side card stock
Score at 7/8”, 4 1/8”, 5” , 8 1/4”
Place the card stock along the top edge of your trimmer with the short 3 ¾” side along
Score at ½”
Use the Detailed Trio Punch – punch a hole in the centre of the second ½ section of your card piece. Please note – the ideal placement of the hole should be opposite to the bottom of the paper where the 7/8” score line is.
Place a strip of Tear and Tape adhesive on the outside 7/8” tab and another strip of tape on the adjacent 7/8” tab on the bottom.
(Optional) At this point- Before you assemble the box, on the other side of card stock place the DSP in one of the 3 ¼” x 3 ¼’ squares with Stampin’ Seal
Remove the protective film on the 2 pieces of Tear and Tape and start assembling.
Place your ribbon spool in the box and feed the ribbon through the punched hole
